서비스의 모니터링이 점점 어려워지는 문제가 발생하고 있었다. 가장 큰 문제는 불필요한 에러 Alert이 너무 많다는 것이다.
그 결과 신경이 더 많이 사용되고 정말 받아야 하는 Alert이 왔을 때 놓치거나 무신경하게 대응할 수 있게 된다.
서비스의 중요도나 위험도, 트래픽 등을 고려했을 때 모니터링 개선이 반드시 필요해서 시간내서 학습하고 적용하게 되었다.
Sentry
Sentry는 에러 모니터링 및 성능 모니터링을 제공해주는 도구이다. 주로 에러 트래킹이나 Slack 등을 통한 Alert으로 많이 사용한다.
예시를 위해 SpringBoot 3.1.9 버전과 아래 라이브러리를 사용했다.
implementation 'io.sentry:sentry-spring-boot-starter-jakarta:7.5.0'yml은 아래와 같이 설정할 수 있다.
sentry:
  dsn: https://fa1b1dc87e3eb8bee49cc2d25b06615e@o4506869937078272.ingest.us.sentry.io/4506869938913280
해당 키는 Sentry에 로그인하면 발급받을 수 있다.
테스트를 해보자.
@RestController
class Controller {
@RequestMapping("/test")
fun test() {
throw RuntimeException("Error!!")
}
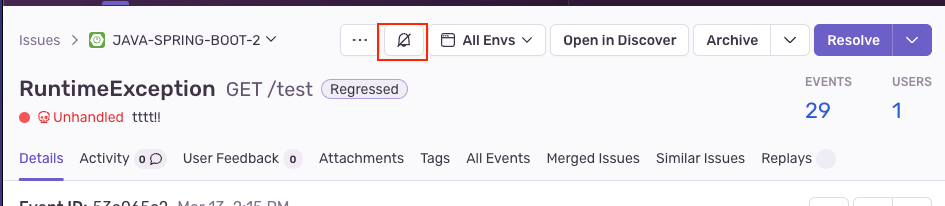
}API를 호출하면 아래와 같이 Sentry로 예외가 전달된다.

이벤트 발생 기준
아래처럼 Exception을 catch하면 에러(Event)가 Sentry로 전달되지 않는다.
@RestController
class Controller {

    @RequestMapping("/test")
    fun test() {
        try {
            throw RuntimeException("catch!!")
        } catch (e: Exception) {
            println(e.message)
        }
    }
}
Sentry를 잘 사용하려면 Error를 전달(Capture)하는 원리와 기준에 대해 알아야 한다.
작동 원리
아래는 Sentry 라이브러리에 있는 SentryExceptionResolver이다.
public class SentryExceptionResolver implements HandlerExceptionResolver, Ordered {

    private final int order;
    // .. 생략

    @Override
    public @Nullable ModelAndView resolveException(
        final @NotNull HttpServletRequest request,
        final @NotNull HttpServletResponse response,
        final @Nullable Object handler,
        final @NotNull Exception ex) {

        final SentryEvent event = createEvent(request, ex);
        final Hint hint = createHint(request, response);

        hub.captureEvent(event, hint);

        // null = run other HandlerExceptionResolvers to actually handle the exception
        return null;
    }

    @NotNull
    protected SentryEvent createEvent(
        final @NotNull HttpServletRequest request, final @NotNull Exception ex) {

        final Mechanism mechanism = new Mechanism();
        mechanism.setHandled(false);
        mechanism.setType(MECHANISM_TYPE);
        final Throwable throwable =
            new ExceptionMechanismException(mechanism, ex, Thread.currentThread());
        final SentryEvent event = new SentryEvent(throwable);
        event.setLevel(SentryLevel.FATAL);
        event.setTransaction(transactionNameProvider.provideTransactionName(request));

        return event;
    }

    // org.springframework.core.Ordered 인터페이스의 메서드
    @Override
    public int getOrder() {
        return order;
    }
}
해당 클래스는 HandlerExceptionResolver를 구현한다. HandlerExceptionResolver는 스프링 웹에서 발생된 예외를 핸들링 할 수 있는 기능을 제공한다.
즉, 예외를 핸들링하는 방식으로 동작하기 때문에 catch한 경우에는 Error가 Sentry로 전달되지 않았던 것이다.
Order
@ControllerAdvice를 사용할 경우 Exception을 터트리지 않고 객체를 반환하도록 하는 경우가 많다.
스프링은 ExceptionHandlerExceptionResolver를 검색하면서 AnnotationAwareOrderComparator를 사용해서 정렬한다. 해당 클래스는 Order를 사용한다.
그래서 아래 속성으로 Order를 명시할 수 있다. default가 1이라서 @ExceptionHandler가 먼저 동작한다. (낮을수록 먼저 동작한다.)
sentry.exception-resolver-order: 1Sentry는 ExceptionResolver 뿐만 아니라 다양한 방법으로 비동기로 Sentry 서버에 이벤트를 전달한다.
- SentryExceptionResolver
- SentrySpringFilter
- SentryWebExceptionHandler
- SentryCaptureExceptionParameterAdvice
- ...
설정
설정은 프로퍼티나 YML 말고도 JVM 언어 등 프로그래밍 언어로도 가능하다.
아래는 .properties를 사용한 예시이다.
# 추적할 Event의 비율을 설정한다. 1.0이면 100%를 캡처한다.
# (너무 높으면 리소스를 많이 사용한다.)
sentry.traces-sample-rate=1.0
# Event를 전송할 확률을 설정한다. 1.0이면 100%를 캡처한다.
# 발생시킬 Event의 태그를 지정
sentry.tags.first_tag=first-tag-value
# 무시할 Exception 정의
sentry.ignored-exceptions-for-type=java.lang.RuntimeException,java.lang.IllegalStateExceptio
# 디버그 모드 (콘솔에 정보 출력)
sentry.debug=true
# 디버그 모드의 로그 레벨 설정 (debug, info, warning, error, fatal - default: debug)
sentry.diagnosticLevel=debug
# 로컬에 저장할 envelopes 수
sentry.maxCacheItems=30
# Stack Trace를 모든 메시지에 첨부
sentry.attachStacktrace=true
# HTTP 요청 본문 캡처 여부 (never, small, medium, alwways)
sentry.maxRequestBodySize=never
# SDK가 Sentry에 이벤트를 보낼 지 여부
sentry.enable=true
# 이벤트를 전송하기 전에 호출할 함수
sentry.beforeSend=null
# 예외 해결 순서 지정, -2147483647로 설정하면 Spring 예외 처리기에서 처리된 오류는 무시한다.
sentry.exception-resolver-order=0
...
해당 프로퍼티들은 특정 예외를 무시하도록 하거나 Event를 전송할 비율 등을 설정할 수 있다.
필터링
Sentry는 올바른 정보와 합리적인 양을 가장 권장한다.
beforeSend는 이벤트가 서버로 전송되기 직전에 호출되기 때문에 이벤트를 편집하거나 아예 전송하지 않을 수 있다.
BeforeSendCallback을 구현해서 빈으로 등록한다. 아래는 이벤트의 serverName 필드를 null로 세팅하기 위한 설정이다.
@Component
class CustomBeforeSendCallback : SentryOptions.BeforeSendCallback {
    override fun execute(event: SentryEvent, hint: Hint): SentryEvent? {
        // Example: Never send server name in events
        event.serverName = null
        return event
    }
}
Exception 정보로 분기를 하는 등 조건 처리도 가능하다.
@Component
class CustomBeforeSendCallback : SentryOptions.BeforeSendCallback {
    override fun execute(event: SentryEvent, hint: Hint): SentryEvent? {
        if (event.throwable is SQLException) {
            return null
        }
        return event
    }
}
Event를 보내지 않도록 설정하면 Sentry 서버의 부담을 줄일 수 있다.
서버에서 Ignore 처리
Sentry 서버에서 Ignore 처리하는 방법도 있다.
클라리언트에서는 이벤트를 발행하고 서버에서는 적재되므로 클라이언트에서 필터링하는 것에 비해 성능이 낭비된다는 점이 있다. 분류가 명확하지 않다면 원하지 않는 내용까지 Ignore 될 수 있다.
Tag 활용
앞에서 작성한 부분은 개선을 위해 공식문서를 학습한 내용이라면 문제 해결을 위해 적용한 주요 내용이 이 부분이다.
아래는 Exception 구조를 예시로 만든 것이다.
class BaeminException(val code: ErrorCode) : RuntimeException(code.message)

enum class ErrorCode(val message: String) {
    USER_NOT_FOUND("유저가 존재하지 않습니다."),
    ORDER_NOT_FOUND("주문이 존재하지 않습니다."),
}
아래 Controller로 요청해보자.
@RestController
class Controller {

    @RequestMapping("/order")
    fun order(): Unit = throw BaeminException(ErrorCode.USER_NOT_FOUND)

}
SentryEvent를 보면 아래와 같이 type은 BaeminException, value는 유저가 존재하지 않습니다. 이다.

즉, 해당 에러가 왔을 때 Alert을 사용하기 위해서는 메시지 문자열로 분기를 해야 하는 상황이 발생한다.

해당 메시지는 충분히 변경될 수 있는 내용이다. 그래서 아래 문제가 존재한다.
- 메시지가 변경될 때마다 Sentry의 Alert에 동기화해야 한다.
- 다른 메시지가 추가되거나 변경될 때 겹쳐서 의도치 않는 결과가 발생할 수 있다.
각 Error에 대한 분류가 쉽지 않는 경우도 많다.
그래서 아래와 같이 BeforeSendCallback을 활용해서 tags에 원하는 값을 세팅해줄 수 있다.
@Component
class BaeminBeforeSendCallback : SentryOptions.BeforeSendCallback {
    override fun execute(
        event: SentryEvent,
        hint: Hint,
    ): SentryEvent? {
        val exception = event.throwable
        if (exception is BaeminException) {
            event.setTag(ERROR_CODE_TAG, exception.code.name)
        }
        return event
    }
}

const val ERROR_CODE_TAG = "errorCode"
Sentry 이벤트에 아래와 같이 tags에 Key-value가 추가된다.

그 결과 아래와 같이 message가 아닌 errorCode로 분류할 수 있게 된다.

이제 해당 Code로 조건을 분기해서 지속가능한 Alert를 만들 수 있게 되었다.
- 불필요한 Alert의 경우 해당 조건으로 제거가 가능해졌다.
- 반드시 필요한 Alert의 경우 해당 조건으로 별도 웹훅을 세팅할 수 있다.
Exception이 계층화되지 않은 경우 Sentry의 1개 이슈에 다수의 에러 내용이 포함되는 경우가 있다.

해당 상황에서 ErrorCode 별로 필터링해서 검색하는 것도 가능해졌다.
로그 통합
예외가 전파되면 Sentry 이벤트를 발행하겠지만, 로그 통합 기능을 사용할 수 있는 방법도 있다.
아래 의존성을 추가한다.
implementation 'io.sentry:sentry-logback:7.6.0'이후 아래 설정을 사용할 수 있다.
# 에러 수준이 error 이상일 때 이벤트 발행
sentry.logging.minimum-event-level=error
# 에러 수준이 debug 이상인 대상만 탐색에 포함
sentry.logging.minimum-breadcrumb-level=infologback-spring.xml로 로그 설정을 통합할 수도 있다.
<?xml version="1.0" encoding="UTF-8"?>
<configuration>
  <include resource="org/springframework/boot/logging/logback/defaults.xml"/>
  <include resource="org/springframework/boot/logging/logback/console-appender.xml" />

  <appender name="SENTRY" class="io.sentry.logback.SentryAppender">
      <minimumEventLevel>ERROR</minimumEventLevel>
      <minimumBreadcrumbLevel>INFO</minimumBreadcrumbLevel>
  </appender>


  <root level="info">
    <appender-ref ref="CONSOLE" />
    <appender-ref ref="SENTRY" />
  </root>
</configuration>
위와 같이 Logback을 사용해서 SentryAppender를 구성할 수 있다.
Throwable 전달하기
Sl4fj를 사용한다면 아래와 같이 로그를 사용할 수 있다.
log.error("유저 찾기 실패. ${e.message}")문제는 로그에 trace가 없을 뿐더러 Sentry Event에 Exception을 담을 수 없다. 위에서 설명한 Tag를 활용한 BeforeSendCallback도 Exception이 없으므로 ErrorCode가 없어서 적용되지 않는다.
그래서 아래와 같이 Log에 Exception을 전달해주는 것이 좋다.
log.error("유저 찾기 실패. ${e.message}", e)참고
'Operation > Monitoring' 카테고리의 다른 글
| Pinpoint 이해하기! (+ vs Prometheus) (1) | 2023.07.03 |
|---|---|
| Apache JMeter란 무엇인가? (+ 사용 방법 with 성능 및 부하 테스트) (0) | 2022.06.11 |